Botão De Envio Do Elemento De Ficheiro Do Formulário De Inicialização Do Twitter
24 answers
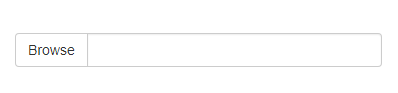
Para fazer um controlo funcional de entrada de ficheiros que se pareça com um botão, só precisa de HTML:
HTML
<label class="btn btn-default">
    Browse <input type="file" hidden>
</label>
Estas técnicas baseiam-se no atributo HTML5 hidden. Bootstrap 4 usa o seguinte CSS para reduzir este recurso em navegadores sem suporte. Poderá ter de adicionar se estiver a usar o Bootstrap 3.
[hidden] {
  display: none !important;
}
Abordagem do legado para o velho IE
Se precisar de suporte para o IE8 e para baixo, use o seguinte HTML/CSS:
HTML
<span class="btn btn-default btn-file">
    Browse <input type="file">
</span>
CSS
.btn-file {
    position: relative;
    overflow: hidden;
}
.btn-file input[type=file] {
    position: absolute;
    top: 0;
    right: 0;
    min-width: 100%;
    min-height: 100%;
    font-size: 100px;
    text-align: right;
    filter: alpha(opacity=0);
    opacity: 0;
    outline: none;
    background: white;
    cursor: inherit;
    display: block;
}
Lembre-se que o velho IE não despoleta a entrada do ficheiro quando carrega num <label>, por isso o CSS "inchado" faz algumas coisas para contornar isso:
- faz com que a extensão de entrada do ficheiro seja toda a largura/altura da área circundante
<span> - faz o ficheiro entrada invisível
Feedback E Leitura Adicional
Eu postei mais detalhes sobre este método, bem como exemplos de como mostrar ao usuário qual/quantos arquivos são selecionados:
Http://www.abeautifulsite.net/whipping-file-inputs-into-shape-with-bootstrap-3/
<label>.
Solução:
<label class="btn btn-primary" for="my-file-selector">
    <input id="my-file-selector" type="file" style="display:none;">
    Button Text Here
</label>
Solução para incluir o nome do ficheiro:
<label class="btn btn-primary" for="my-file-selector">
    <input id="my-file-selector" type="file" style="display:none"
    onchange="$('#upload-file-info').html(this.files[0].name)">
    Button Text Here
</label>
<span class='label label-info' id="upload-file-info"></span>
A solução acima requer jQuery.
Sem necessidade de plugin adicional, esta solução de bootstrap funciona muito bem para mim:
<div style="position:relative;">
<a class='btn btn-primary' href='javascript:;'>
Choose File...
<input type="file" style='position:absolute;z-index:2;top:0;left:0;filter: alpha(opacity=0);-ms-filter:"progid:DXImageTransform.Microsoft.Alpha(Opacity=0)";opacity:0;background-color:transparent;color:transparent;' name="file_source" size="40" onchange='$("#upload-file-info").html($(this).val());'>
</a>
<span class='label label-info' id="upload-file-info"></span>
</div>
Demo:
Http://jsfiddle.net/haisumbhatti/cAXFA/1/ (bootstrap 2)

Http://jsfiddle.net/haisumbhatti/y3xyU/ (bootstrap 3)

Pode ser criado um botão simples de envio com
<span class="btn btn-file">Upload<input type="file" /></span>
Com o 'plugin' de carregamento, poderá criar elementos mais avançados. Dê uma olhada http://jasny.github.io/bootstrap/javascript/#fileinput
Os botões de Upload são uma dor ao estilo porque ele Estilo A entrada e não o botão.
Mas podes usar este truque.Http://www.quirksmode.org/dom/inputfile.html
Resumo:
Tome um normal {[[0]} e coloque - o num elemento com
position: relative.A este mesmo elemento pai, adicione um
<input>normal e uma imagem, que tem os estilos corretos. Posição estes elementos absolutamente, de modo que eles ocupam o mesmo lugar que o<input type="file">.Configure o índice z do
<input type="file">para 2, de modo a que fique no topo da entrada/imagem estilizada.Finalmente, defina a opacidade do
<input type="file">para 0. O {[[0]} agora torna-se efectivamente invisível, e os estilos de entrada/imagem brilham, mas você ainda pode clicar no botão "Navegar". Se o botão estiver posicionado em cima da imagem, o usuário aparece para clicar na imagem e fica com a janela de seleção de arquivo normal. (Note que você não pode usar visibilidade: escondida, porque um elemento verdadeiramente invisível também é imperceptível, e precisamos de permanecer clicáveis.)
Funciona para mim:
Actualizar
// Based in: http://duckranger.com/2012/06/pretty-file-input-field-in-bootstrap/
// Version: 0.0.3
// Compatibility with: Bootstrap 3.2.0 and jQuery 2.1.1
// Use:
//     <input class="nice_file_field" type="file" data-label="Choose Document">
//     <script> $(".nice_file_field").niceFileField(); </script>
//
(function( $ ) {
  $.fn.niceFileField = function() {
    this.each(function(index, file_field) {
      file_field = $(file_field);
      var label = file_field.attr("data-label") || "Choose File";

      file_field.css({"display": "none"});

      nice_file_block_text  = '<div class="input-group nice_file_block">';
      nice_file_block_text += '  <input type="text" class="form-control">';
      nice_file_block_text += '  <span class="input-group-btn">';
      nice_file_block_text += '   <button class="btn btn-default nice_file_field_button" type="button">' + label + '</button>';
      nice_file_block_text += '  </span>';
      nice_file_block_text += '</div>';

      file_field.after(nice_file_block_text);

      var nice_file_field_button = file_field.parent().find(".nice_file_field_button");
      var nice_file_block_element = file_field.parent().find(".nice_file_block");

      nice_file_field_button.on("click", function(){ console.log("click"); file_field.click() } );
      file_field.change( function(){
        nice_file_block_element.find("input").val(file_field.val());
      });
    });
  };
})( jQuery );
Resposta simplificada usando partes de outras respostas, principalmente user2309766 e dotcomsuperstar.
Características:
- usa o botão de inicialização Adicionar para o botão e o campo.
- apenas uma entrada; várias entradas seriam captadas por um formulário.
- nenhum css extra excepto "display: none;" Para esconder a entrada do ficheiro.
- o botão visível dispara, carregue em evento para a entrada escondida do ficheiro.
-
splitPara remover a localização do ficheiro, usa a expressão regular e os delimitadores ' \ ' e '/'.
Código:
<script src="https://maxcdn.bootstrapcdn.com/bootstrap/3.3.4/js/bootstrap.min.js"></script>
<link href="https://maxcdn.bootstrapcdn.com/bootstrap/3.3.4/css/bootstrap.min.css" rel="stylesheet"/>
<script src="https://ajax.googleapis.com/ajax/libs/jquery/2.1.1/jquery.min.js"></script>

<div class="input-group">
  <span class="input-group-btn">
    <span class="btn btn-primary" onclick="$(this).parent().find('input[type=file]').click();">Browse</span>
    <input name="uploaded_file" onchange="$(this).parent().parent().find('.form-control').html($(this).val().split(/[\\|/]/).pop());" style="display: none;" type="file">
  </span>
  <span class="form-control"></span>
</div>Com alguma inspiração noutras publicações acima, aqui está uma solução completa que combina o que se parece com um campo de controlo de formulários com um elemento de entrada-grupo-addon para um elemento de entrada de ficheiros limpo que inclui uma ligação ao ficheiro actual.
.input-file { position: relative; margin: 60px 60px 0 } /* Remove margin, it is just for stackoverflow viewing */
.input-file .input-group-addon { border: 0px; padding: 0px; }
.input-file .input-group-addon .btn { border-radius: 0 4px 4px 0 }
.input-file .input-group-addon input { cursor: pointer; position:absolute; width: 72px; z-index:2;top:0;right:0;filter: alpha(opacity=0);-ms-filter:"progid:DXImageTransform.Microsoft.Alpha(Opacity=0)";opacity:0; background-color:transparent; color:transparent; }
<script src="https://ajax.googleapis.com/ajax/libs/jquery/2.1.1/jquery.min.js"></script>
<link rel="stylesheet" href="https://maxcdn.bootstrapcdn.com/bootstrap/3.3.1/css/bootstrap.min.css">
<div class="input-group input-file">
<div class="form-control">
<a href="/path/to/your/current_file_name.pdf" target="_blank">current_file_name.pdf</a>
</div>
<span class="input-group-addon">
<a class='btn btn-primary' href='javascript:;'>
Browse
<input type="file" name="field_name" onchange="$(this).parent().parent().parent().find('.form-control').html($(this).val());">
</a>
</span>
</div>isto funciona perfeitamente para mim.
<span>
<input type="file"
style="visibility:hidden; width: 1px;"
id='${multipartFilePath}' name='${multipartFilePath}'
onchange="$(this).parent().find('span').html($(this).val().replace('C:\\fakepath\\', ''))" /> <!-- Chrome security returns 'C:\fakepath\' -->
<input class="btn btn-primary" type="button" value="Upload File.." onclick="$(this).parent().find('input[type=file]').click();"/> <!-- on button click fire the file click event -->
<span class="badge badge-important" ></span>
</span>
Por favor, verifique a entrada de ficheiro de inicialização no Twitter. Ele usa uma solução muito simples, basta adicionar um arquivo javascript e colar o seguinte código:
$('input[type=file]').bootstrapFileInput();
Uma solução simples com resultado aceitável:
<input type="file" class="form-control">
E o estilo:
input[type=file].form-control {
    height: auto;
}
Criei um botão de envio personalizado para aceitar apenas imagens, que podem ser modificadas de acordo com a sua exigência.
Espero que isto ajude!! :)(Sistema de Bootstrap usado)
HTML
<center>
 <br />
 <br />
 <span class="head">Upload Button Re-Imagined</span>
 <br />
 <br />
 <div class="fileUpload blue-btn btn width100">
   <span>Upload your Organizations logo</span>
   <input type="file" class="uploadlogo" />
 </div>
</center>
CSS
 .head {
   font-size: 25px;
   font-weight: 200;
 }

 .blue-btn:hover,
 .blue-btn:active,
 .blue-btn:focus,
 .blue-btn {
   background: transparent;
   border: solid 1px #27a9e0;
   border-radius: 3px;
   color: #27a9e0;
   font-size: 16px;
   margin-bottom: 20px;
   outline: none !important;
   padding: 10px 20px;
 }

 .fileUpload {
   position: relative;
   overflow: hidden;
   height: 43px;
   margin-top: 0;
 }

 .fileUpload input.uploadlogo {
   position: absolute;
   top: 0;
   right: 0;
   margin: 0;
   padding: 0;
   font-size: 20px;
   cursor: pointer;
   opacity: 0;
   filter: alpha(opacity=0);
   width: 100%;
   height: 42px;
 }


 /*Chrome fix*/

 input::-webkit-file-upload-button {
   cursor: pointer !important;
 }
JS
// You can modify the upload files to pdf's, docs etc
//Currently it will upload only images
$(document).ready(function($) {

  // Upload btn
  $(".uploadlogo").change(function() {
    readURL(this);
  });

  function readURL(input) {
    var url = input.value;
    var ext = url.substring(url.lastIndexOf('.') + 1).toLowerCase();
    if (input.files && input.files[0] && (ext == "png" || ext == "jpeg" || ext == "jpg" || ext == "gif" || ext == "svg")) {
      var path = $('.uploadlogo').val();
      var filename = path.replace(/^.*\\/, "");
      $('.fileUpload span').html('Uploaded logo : ' + filename);
      // console.log(filename);
    } else {
      $(".uploadlogo").val("");
      $('.fileUpload span').html('Only Images Are Allowed!');
    }
  }
});
Este é o melhor estilo de envio de ficheiros que eu gosto:
<div class="fileupload fileupload-new" data-provides="fileupload">
  <div class="input-append">
    <div class="uneditable-input span3"><i class="icon-file fileupload-exists"></i> <span class="fileupload-preview"></span></div><span class="btn btn-file"><span class="fileupload-new">Select file</span><span class="fileupload-exists">Change</span><input type="file" /></span><a href="#" class="btn fileupload-exists" data-dismiss="fileupload">Remove</a>
  </div>
</div>
Você pode obter demo e mais estilos em:
Http://www.jasny.net/bootstrap/javascript/#fileinput
Mas se usar isto, deve substituir o twitter bootstrap por ficheiros jasny bootstrap..
Cumprimentos.
/* * Bootstrap 3 filestyle http://dev.tudosobreweb.com.br/bootstrap-filestyle/ * * Copyright (c) 2013 Markus Vinicius da Silva Lima * Update bootstrap 3 by Paulo Henrique Foxer * Version 2.0.0 * Licensed under the MIT license. * */
(function ($) {
"use strict";

var Filestyle = function (element, options) {
    this.options = options;
    this.$elementFilestyle = [];
    this.$element = $(element);
};

Filestyle.prototype = {
    clear: function () {
        this.$element.val('');
        this.$elementFilestyle.find(':text').val('');
    },

    destroy: function () {
        this.$element
            .removeAttr('style')
            .removeData('filestyle')
            .val('');
        this.$elementFilestyle.remove();
    },

    icon: function (value) {
        if (value === true) {
            if (!this.options.icon) {
                this.options.icon = true;
                this.$elementFilestyle.find('label').prepend(this.htmlIcon());
            }
        } else if (value === false) {
            if (this.options.icon) {
                this.options.icon = false;
                this.$elementFilestyle.find('i').remove();
            }
        } else {
            return this.options.icon;
        }
    },

    input: function (value) {
        if (value === true) {
            if (!this.options.input) {
                this.options.input = true;
                this.$elementFilestyle.prepend(this.htmlInput());

                var content = '',
                    files = [];
                if (this.$element[0].files === undefined) {
                    files[0] = {'name': this.$element[0].value};
                } else {
                    files = this.$element[0].files;
                }

                for (var i = 0; i < files.length; i++) {
                    content += files[i].name.split("\\").pop() + ', ';
                }
                if (content !== '') {
                    this.$elementFilestyle.find(':text').val(content.replace(/\, $/g, ''));
                }
            }
        } else if (value === false) {
            if (this.options.input) {
                this.options.input = false;
                this.$elementFilestyle.find(':text').remove();
            }
        } else {
            return this.options.input;
        }
    },

    buttonText: function (value) {
        if (value !== undefined) {
            this.options.buttonText = value;
            this.$elementFilestyle.find('label span').html(this.options.buttonText);
        } else {
            return this.options.buttonText;
        }
    },

    classButton: function (value) {
        if (value !== undefined) {
            this.options.classButton = value;
            this.$elementFilestyle.find('label').attr({'class': this.options.classButton});
            if (this.options.classButton.search(/btn-inverse|btn-primary|btn-danger|btn-warning|btn-success/i) !== -1) {
                this.$elementFilestyle.find('label i').addClass('icon-white');
            } else {
                this.$elementFilestyle.find('label i').removeClass('icon-white');
            }
        } else {
            return this.options.classButton;
        }
    },

    classIcon: function (value) {
        if (value !== undefined) {
            this.options.classIcon = value;
            if (this.options.classButton.search(/btn-inverse|btn-primary|btn-danger|btn-warning|btn-success/i) !== -1) {
                this.$elementFilestyle.find('label').find('i').attr({'class': 'icon-white '+this.options.classIcon});
            } else {
                this.$elementFilestyle.find('label').find('i').attr({'class': this.options.classIcon});
            }
        } else {
            return this.options.classIcon;
        }
    },

    classInput: function (value) {
        if (value !== undefined) {
            this.options.classInput = value;
            this.$elementFilestyle.find(':text').addClass(this.options.classInput);
        } else {
            return this.options.classInput;
        }
    },

    htmlIcon: function () {
        if (this.options.icon) {
            var colorIcon = '';
            if (this.options.classButton.search(/btn-inverse|btn-primary|btn-danger|btn-warning|btn-success/i) !== -1) {
                colorIcon = ' icon-white ';
            }

            return '<i class="'+colorIcon+this.options.classIcon+'"></i> ';
        } else {
            return '';
        }
    },

    htmlInput: function () {
        if (this.options.input) {
            return '<input type="text" class="'+this.options.classInput+'" style="width: '+this.options.inputWidthPorcent+'% !important;display: inline !important;" disabled> ';
        } else {
            return '';
        }
    },

    constructor: function () {
        var _self = this,
            html = '',
            id = this.$element.attr('id'),
            files = [];

        if (id === '' || !id) {
            id = 'filestyle-'+$('.bootstrap-filestyle').length;
            this.$element.attr({'id': id});
        }

        html = this.htmlInput()+
             '<label for="'+id+'" class="'+this.options.classButton+'">'+
                this.htmlIcon()+
                '<span>'+this.options.buttonText+'</span>'+
             '</label>';

        this.$elementFilestyle = $('<div class="bootstrap-filestyle" style="display: inline;">'+html+'</div>');

        var $label = this.$elementFilestyle.find('label');
        var $labelFocusableContainer = $label.parent();

        $labelFocusableContainer
            .attr('tabindex', "0")
            .keypress(function(e) {
                if (e.keyCode === 13 || e.charCode === 32) {
                    $label.click();
                }
            });

        // hidding input file and add filestyle
        this.$element
            .css({'position':'absolute','left':'-9999px'})
            .attr('tabindex', "-1")
            .after(this.$elementFilestyle);

        // Getting input file value
        this.$element.change(function () {
            var content = '';
            if (this.files === undefined) {
                files[0] = {'name': this.value};
            } else {
                files = this.files;
            }

            for (var i = 0; i < files.length; i++) {
                content += files[i].name.split("\\").pop() + ', ';
            }

            if (content !== '') {
                _self.$elementFilestyle.find(':text').val(content.replace(/\, $/g, ''));
            }
        });

        // Check if browser is Firefox
        if (window.navigator.userAgent.search(/firefox/i) > -1) {
            // Simulating choose file for firefox
            this.$elementFilestyle.find('label').click(function () {
                _self.$element.click();
                return false;
            });
        }
    }
};

var old = $.fn.filestyle;

$.fn.filestyle = function (option, value) {
    var get = '',
        element = this.each(function () {
            if ($(this).attr('type') === 'file') {
                var $this = $(this),
                    data = $this.data('filestyle'),
                    options = $.extend({}, $.fn.filestyle.defaults, option, typeof option === 'object' && option);

                if (!data) {
                    $this.data('filestyle', (data = new Filestyle(this, options)));
                    data.constructor();
                }

                if (typeof option === 'string') {
                    get = data[option](value);
                }
            }
        });

    if (typeof get !== undefined) {
        return get;
    } else {
        return element;
    }
};

$.fn.filestyle.defaults = {
    'buttonText': 'Escolher arquivo',
    'input': true,
    'icon': true,
    'inputWidthPorcent': 65,
    'classButton': 'btn btn-primary',
    'classInput': 'form-control file-input-button',
    'classIcon': 'icon-folder-open'
};

$.fn.filestyle.noConflict = function () {
    $.fn.filestyle = old;
    return this;
};

// Data attributes register
$('.filestyle').each(function () {
    var $this = $(this),
        options = {
            'buttonText': $this.attr('data-buttonText'),
            'input': $this.attr('data-input') === 'false' ? false : true,
            'icon': $this.attr('data-icon') === 'false' ? false : true,
            'classButton': $this.attr('data-classButton'),
            'classInput': $this.attr('data-classInput'),
            'classIcon': $this.attr('data-classIcon')
        };

    $this.filestyle(options);
});
})(window.jQuery);
Eu uso http://gregpike.net/demos/bootstrap-file-input/demo.html:
$('input[type=file]').bootstrapFileInput();
Ou
$('.file-inputs').bootstrapFileInput();
Solução para envio múltiplo
Alterei duas respostas anteriores para incluir vários uploads. Desta forma, a legenda mostra o nome do ficheiro, se apenas um estiver seleccionado, oux files no caso oposto.
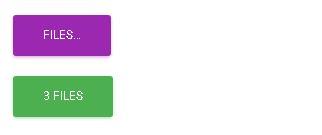
<label class="btn btn-primary" for="my-file-selector">
<input id="my-file-selector" type="file" multiple="multiple" style="display:none"
onchange="$('#upload-file-info').html(
(this.files.length > 1) ? this.files.length + ' files' : this.files[0].name)">
Files…
</label>
<span class='label label-info' id="upload-file-info"></span>

Também pode aplicar-se para alterar o texto do botão e a classe.
<label class="btn btn-primary" for="multfile">
<input id="multfile" type="file" multiple="multiple" style="display:none"
onchange="$('#multfile-label').html(
(this.files.length == 1) ? this.files[0].name : this.files.length + ' files');
$(this).parent().addClass('btn-success')">
<span id="multfile-label">Files…</span>
</label>
Modifiquei a resposta de @ claviska e funciona como eu quiser (Bootstrap 3, 4 não testado):
<label class="btn btn-default">
    <span>Browse</span>
    <input type="file" style="display: none;" onchange="$(this).prev('span').text($(this).val()!=''?$(this).val():'Browse')">
</label>
O seguinte código faz como acima da imagem
Html
<form>
<div class="row">
<div class="col-lg-6">
<label for="file">
<div class="input-group">
<span class="input-group-btn">
<button class="btn btn-default" type="button">Browse</button>
</span>
<input type="text" class="form-control" id="info" readonly="" style="background: #fff;" placeholder="Search for...">
</div><!-- /input-group -->
</label>
</div><!-- /.col-lg-6 -->
</div>

</div>
<input type="file" style="display: none;" onchange="$('#info').val($(this).val().split(/[\\|/]/).pop()); " name="file" id="file">
</form>
Javascript
<script type="text/javascript">

$(function() {
    $("label[for=file]").click(function(event) {
        event.preventDefault();
        $("#file").click();
    });
});

</script>
Não é necessária nenhuma fantasia:
HTML:
<form method="post" action="/api/admin/image" enctype="multipart/form-data">
    <input type="hidden" name="url" value="<%= boxes[i].url %>" />
    <input class="image-file-chosen" type="text" />
    <br />
    <input class="btn image-file-button" value="Choose Image" />
    <input class="image-file hide" type="file" name="image"/> <!-- Hidden -->
    <br />
    <br />
    <input class="btn" type="submit" name="image" value="Upload" />
    <br />
</form>
JS:
$('.image-file-button').each(function() {
      $(this).off('click').on('click', function() {
           $(this).siblings('.image-file').trigger('click');
      });
});
$('.image-file').each(function() {
      $(this).change(function () {
           $(this).siblings('.image-file-chosen').val(this.files[0].name);
      });
});
Cuidado: os três elementos de forma em questão devem ser irmãos um do outro (.Imagem-arquivo-escolhido,.image-file-button,.imagem-ficheiro)
<div>
<button type='button' class='btn btn-info btn-file'>Browse</button>
<input type='file' name='image'/>
</div>
O CSS
<style>
.btn-file {
    position:absolute;
}
</style>
O JS
<script>
$(document).ready(function(){
    $('.btn-file').click(function(){
        $('input[name="image"]').click();
    });
});
</script>
Espero que tenhas encontrado a melhor solução...Nota : Botao .o ficheiro btn deve estar na mesma marca que o ficheiro de entrada
Tenta seguir no Bootstrap v. 3.3.4
<div>
    <input id="uplFile" type="file" style="display: none;">

    <div class="input-group" style="width: 300px;">
        <div  id="btnBrowse"  class="btn btn-default input-group-addon">Select a file...</div>
        <span id="photoCover" class="form-control">
    </div>
</div>

<script type="text/javascript">
    $('#uplFile').change(function() {
        $('#photoCover').text($(this).val());
    });

    $('#btnBrowse').click(function(){
        $('#uplFile').click();
    });
</script>
Código HTML:
<button clss="btn btn-primary" id="btn_upload">Choose File</button>
<input id="fileupload" class="hide" type="file" name="files[]">
Javascript:
$("#btn_upload").click(function(e){
e.preventDefault();
$("#fileupload").trigger('click');
});
Em relação à resposta de claviska - se quiser mostrar o nome do ficheiro carregado num envio de ficheiro básico, pode fazê-lo no evento' onchange'. Basta usar este código:
 <label class="btn btn-default">
                    Browse...
                    <span id="uploaded-file-name" style="font-style: italic"></span>
                    <input id="file-upload" type="file" name="file"
                           onchange="$('#uploaded-file-name').text($('#file-upload')[0].value);" hidden>
 </label>
Este código jQuery JS é responsável por obter o nome do ficheiro carregado:
$('#file-upload')[0].value
Ou com baunilha JS:
document.getElementById("file-upload").value

Http://markusslima.github.io/bootstrap-filestyle/
$(":file").filestyle();
Ou
<input type="file" class="filestyle" data-input="false">